Cosmetic Packaging
Display Packaging
CBD Packaging
Retail Packaging
Product Packaging
Cigarette Packaging
Candle Packaging
Soap Packaging
Chocolate Packaging
Vape Packaging
Food Packaging
Gift Packaging
Bakery Packaging Boxes
Pizza Packaging
Bottle Packaging
Garments Packaging
Custom Printed Bags
Christmas Packaging
Toy Packaging
Cereal Packaging
Jewelry Packaging
Apparel Packaging
Shipping Packaging
Custom Pre Roll Boxes
Dispenser packaging
Eco Friendly Packaging
Custom Health Packaging
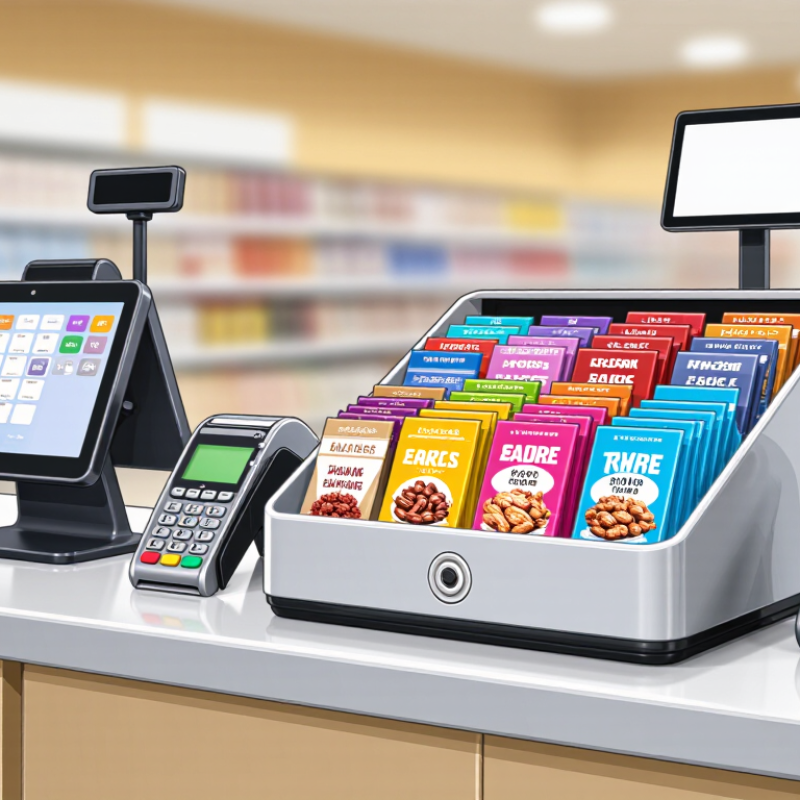
Pharmaceutical PackagingAt a crowded checkout, a small display can influence what shoppers notice while they wait. Counter display boxes bring products within easy reach and give them a clear place in the store. A neatly faced row of lip balms, snack bars, or sample-size goods can stand out beside the payment terminal. Retail packaging consultant Jordan Lee puts the principle simply: “A good counter display earns attention without slowing the sale.” The best designs support the shopping experience; they do not compete with it.
For retailers, these boxes can help organize small items, introduce new products, and reinforce a brand through color, copy, and shape. Their value depends on practical details: a stable base, readable labels, easy restocking, and a footprint that fits the counter. Small details matter. A display that blocks the card reader or hides the product can frustrate shoppers, however attractive it looks in a photograph. That trade-off deserves more attention than it often gets. Materials and construction also affect durability, especially when staff refill the display throughout the day. This guide explores why counter display boxes matter in retail, how they capture attention, and what to consider when selecting a design. It also recognizes a limitation: no box can replace relevant products, thoughtful placement, or attentive service.
A counter display box is a compact holder placed on or beside a checkout counter. It keeps small, easy-to-browse products visible where customers pause to pay. Common designs use folded cardboard, with front openings that reveal the contents and side panels that help the box stay upright. Some include dividers to keep items neat. The exact structure depends on the product’s size and weight.
At the point of sale, the box gives products a defined space instead of leaving them scattered across the counter. Clear product visibility and easy access can encourage customers to notice an item while waiting. Staff can also restock the display quickly and check remaining inventory at a glance. Placement matters: a box should not block payment equipment, obscure important notices, or crowd the working area. A display may attract attention, but it cannot fix a poor product fit or confusing presentation.
Tips: Match the box opening to the product, so shoppers can see and remove items without struggling. Keep the display tidy, and check it during routine counter service. Test its stability on the actual counter surface; a lightweight box can shift when customers reach for products. Small details matter. And not every counter needs one.
Counter display boxes come in several practical formats, and each suits a different product. A shallow countertop tray keeps small packaged snacks, stationery, or travel-size toiletries easy to browse. Divided compartments stop slim items from sliding into a messy pile. Small items need order. Tiered boxes raise products toward eye level, making them useful for small accessories near a checkout. A perforated carton can convert into an open-front display, which helps staff restock without unpacking every item.
Open-top dump bins work better for sturdy, individually packaged products that shoppers can pick up quickly. They offer high capacity, but mixed items can look untidy. Choose a format based on product weight, package size, and how often staff can refill it. A box that blocks the cashier’s view or crowds the payment area creates friction, even if it looks attractive. Check that the base stays steady when customers remove products; thin board may bow under heavier stock.
Tips: Measure the counter before ordering. Test the display with real products, not just a mock-up. Keep the price visible, leave room for payment, and refill before the front row looks bare. One detail is easy to overlook: glossy packaging can reflect overhead lights, making labels harder to read.
In-store choices often happen quickly, with shoppers comparing products while waiting at checkout or speaking with staff. POPAI has reported that 76% of purchase decisions are made in-store, highlighting the value of clear, timely product visibility. That figure is useful, but it should not be treated as a guarantee for every store or category. A counter display box can bring a small range of items into a shopper’s natural line of sight, rather than leaving them hidden on a crowded shelf. It also gives each product a defined place. Small details matter.
A practical display keeps the product name, key benefit, and price easy to scan. For example, a neat box beside the till can help shoppers notice travel-sized goods while they wait, without blocking payment space or staff access. Durable board, stable construction, and tidy replenishment support a more reliable presentation throughout the day. Yet visibility alone does not create demand. If the message is unclear, the display is poorly positioned, or stock runs low, the box may simply become clutter. Retail teams can test different placements and review sales or shopper feedback, then adjust accordingly. The first setup may not be the best one.
| Retail dimension | What a counter display can support | Useful measurement | How to interpret it |
|---|---|---|---|
| In-store decision context | The display places products and messages where shoppers can see them while browsing or waiting to pay. | Share of purchase decisions made in-store: 76%, as reported by POPAI and cited in the article title. | This is a broad in-store decision statistic, not a measured sales lift attributable to counter displays. |
| Product visibility | Raised, organized product placement can make items easier to notice at the point of sale. | Visibility rate = observed shoppers who notice the display ÷ shoppers observed within the defined viewing area. | Compare locations or display versions using the same observation area, time period, and counting method. |
| Shopper engagement | A clear layout and concise product information can invite shoppers to pause, inspect, or handle products. | Engagement rate = shoppers who interact with the display ÷ shoppers who pass its viewing area. | Define “interaction” in advance, such as picking up a product or reading the display information. |
| Purchase conversion | Positioning products near checkout can make them available at a convenient point in the shopping journey. | Display conversion = units sold during the test period ÷ qualified display interactions, when interactions can be counted reliably. | Use a comparable control location or period before attributing a sales change to the display. |
| Stock availability | A defined product layout can help staff see low stock and keep products presented neatly. | On-shelf availability = checks when the item is available for purchase ÷ total scheduled checks. | Record checks consistently; an empty display can reduce the opportunity for shoppers to purchase. |
| Space efficiency | A compact format can present selected products on a counter without requiring a full-size floor fixture. | Sales per display footprint = units sold or revenue ÷ display area, using a consistent area definition. | Compare only displays with comparable product ranges, selling periods, and store conditions. |
| Execution consistency | A standardized box and product arrangement can help maintain a consistent presentation across stores. | Compliance rate = stores meeting the display checklist ÷ stores checked. | Use a simple checklist covering placement, product facing, signage, and stock condition. |
Note: The 76% figure is presented as a reported in-store decision statistic. The other entries are measurement definitions, not claimed industry averages or guaranteed results.
Counter display boxes must fit the product, the counter, and the shopper’s reach. The U.S. Census Bureau reported that e-commerce represented 16.1% of U.S. retail sales in 2024, so physical stores still account for most sales. A display that blocks the checkout area or hides the product can waste that valuable space. Measure the items, including their packaging, then allow enough room for fingers to lift them without tipping the box.
Material strength matters when stock is handled repeatedly. Choose corrugated board or other suitable stock that resists crushing, and check the base with a fully loaded sample. A box may look sturdy when empty. That can be misleading. Branding should remain readable from a few steps away: use a clear product name, strong contrast, and one focused message rather than several competing claims. Finally, design replenishment into the structure. An open front, simple tear-away panel, or removable tray can help staff refill products quickly while keeping the display tidy.
Tips: Test the box on the actual counter. Load it, remove products from the front and back, and time a refill. If staff need tools or must rearrange every item, revise the access points before printing a full run.
Key design factors: product fit, material strength, branding, and replenishment.
Illustrative prototype dimensions: 10 mm product clearance, 3 mm board thickness, 70 mm branding panel height, and a 180 mm replenishment opening. These are example specifications, not universal standards; adjust them to the product, material, and retail setup.
Counter display boxes suit small, lightweight products that shoppers can understand at a glance. Think wrapped snacks near café registers, travel-size skincare beside pharmacy counters, or greeting cards at gift-shop tills.
Shop! Association’s 2012 Shopper Engagement Study reported that 76% of purchase decisions were made in-store. That supports visible placement, but it does not mean every counter display will sell. Product fit and clear pricing still matter.
Match the box to the counter’s pace. At a busy checkout, use a compact, stable unit with a few easy-to-reach items; avoid blocking payment terminals or staff sightlines. At service desks, such as cosmetics or electronics counters, a smaller selection can prompt questions and demonstrations. In bookstores, stationery shops, and garden centers, displays can group add-ons near relevant purchases. A seed packet beside the till feels more useful than a random assortment. Sometimes the obvious placement is still wrong.
Tips: Measure the counter before ordering. Check reach, sightlines, and refill access during a real shift. Keep labels facing forward, and test one location for a week. Track units sold, not just attention. If staff must constantly straighten the display, reduce the stock or choose a sturdier box.
© 2007 - 2025 The Custom Packaging. All right reserved.